WOW. We got one more day for learning. Its awesome 🙂
Today I selected a very easy topic “Continuous Integration”. So what is continuous integration. In simple words when developer is lazy and did not want to do lot of work they implement continuous integration. So as they push there code on some version control system like Git, bitbucket etc CI server automatically run all the unit tests and if tests success CI generate a build which you can send to testers. If you are more lazy you can add more scripts, so build automatically send to all of your QA’s or testers and if you are super lazy there is a possibility you can implement Continuous Deployment (CD). In CD you can publish your apps on app store by doing only one push in a branch. So if you are super lazy as a developer then implement CI or CD and enjoy more time in sleeping or in any thing like you. 🙂
OK friends now first thing forgot the word CI or CD from now. I want to teach you not to tell you what is CI. So please forgot CI from your brain and focus what I tell you. I guarantee you in the end you are able to do CI in minutes. Ready ….
In this tutorial my focus is Android specific so if you want to do CI for some other platform. Instructions not helpful but if you want to know how and what is CI then you can continue reading you will get benefit.
As we know platform used build tools to compile there code or make final product. Mostly people know about Ant or Maven. You can work without these build tools. You can make builds by using terminal but it take a lot of time. To save that time we used build tools with IDE’s. In simple words when you click on a Run button on your IDE they start running commands which require to make a build and because computer can execute these instructions very speedily we prefer these tools.
As technology reaches to new levels we need to run lot of commands to create a build. Like I want to run unit tests then check if its a QA build set QA server urls and if Production then change url’s and keys and lot of things. So as a human we are lazy and we easily forgot things so we give all these duties to build systems. They are doing this work efficiently.
Android Studio used a Gradle as a build system. Gradle used a groovy language. Its a dynamic and awesome language. Reminder that tutorial is not for build system and not for Gralde but I will show you some beginner things about gradle which are compulsory in my opinion for this tutorial. So create a simple android project with name CI 🙂 .
Step 1:


As you see its simple default project. No need to change any thing.
Step 2:
Now start discussion about build tool Gradle. I want to run this project on my device or emulator I will click a button in a menu as shown in below image.

Basically when we click. Our build tool system run commands. First command is build and if that command successful then it run a second command which is install. So if I want to do this thing manually how can I do? In next images I am showing you how you can do this thing in Android Studio manually. One more thing friends in Gradle we use term task not command :).

Open Gradle tab and you can see here we have a our project with name CI in above image. Click on that.

You see a lot of tasks do not take tension only open build directory and double click on build task and done.
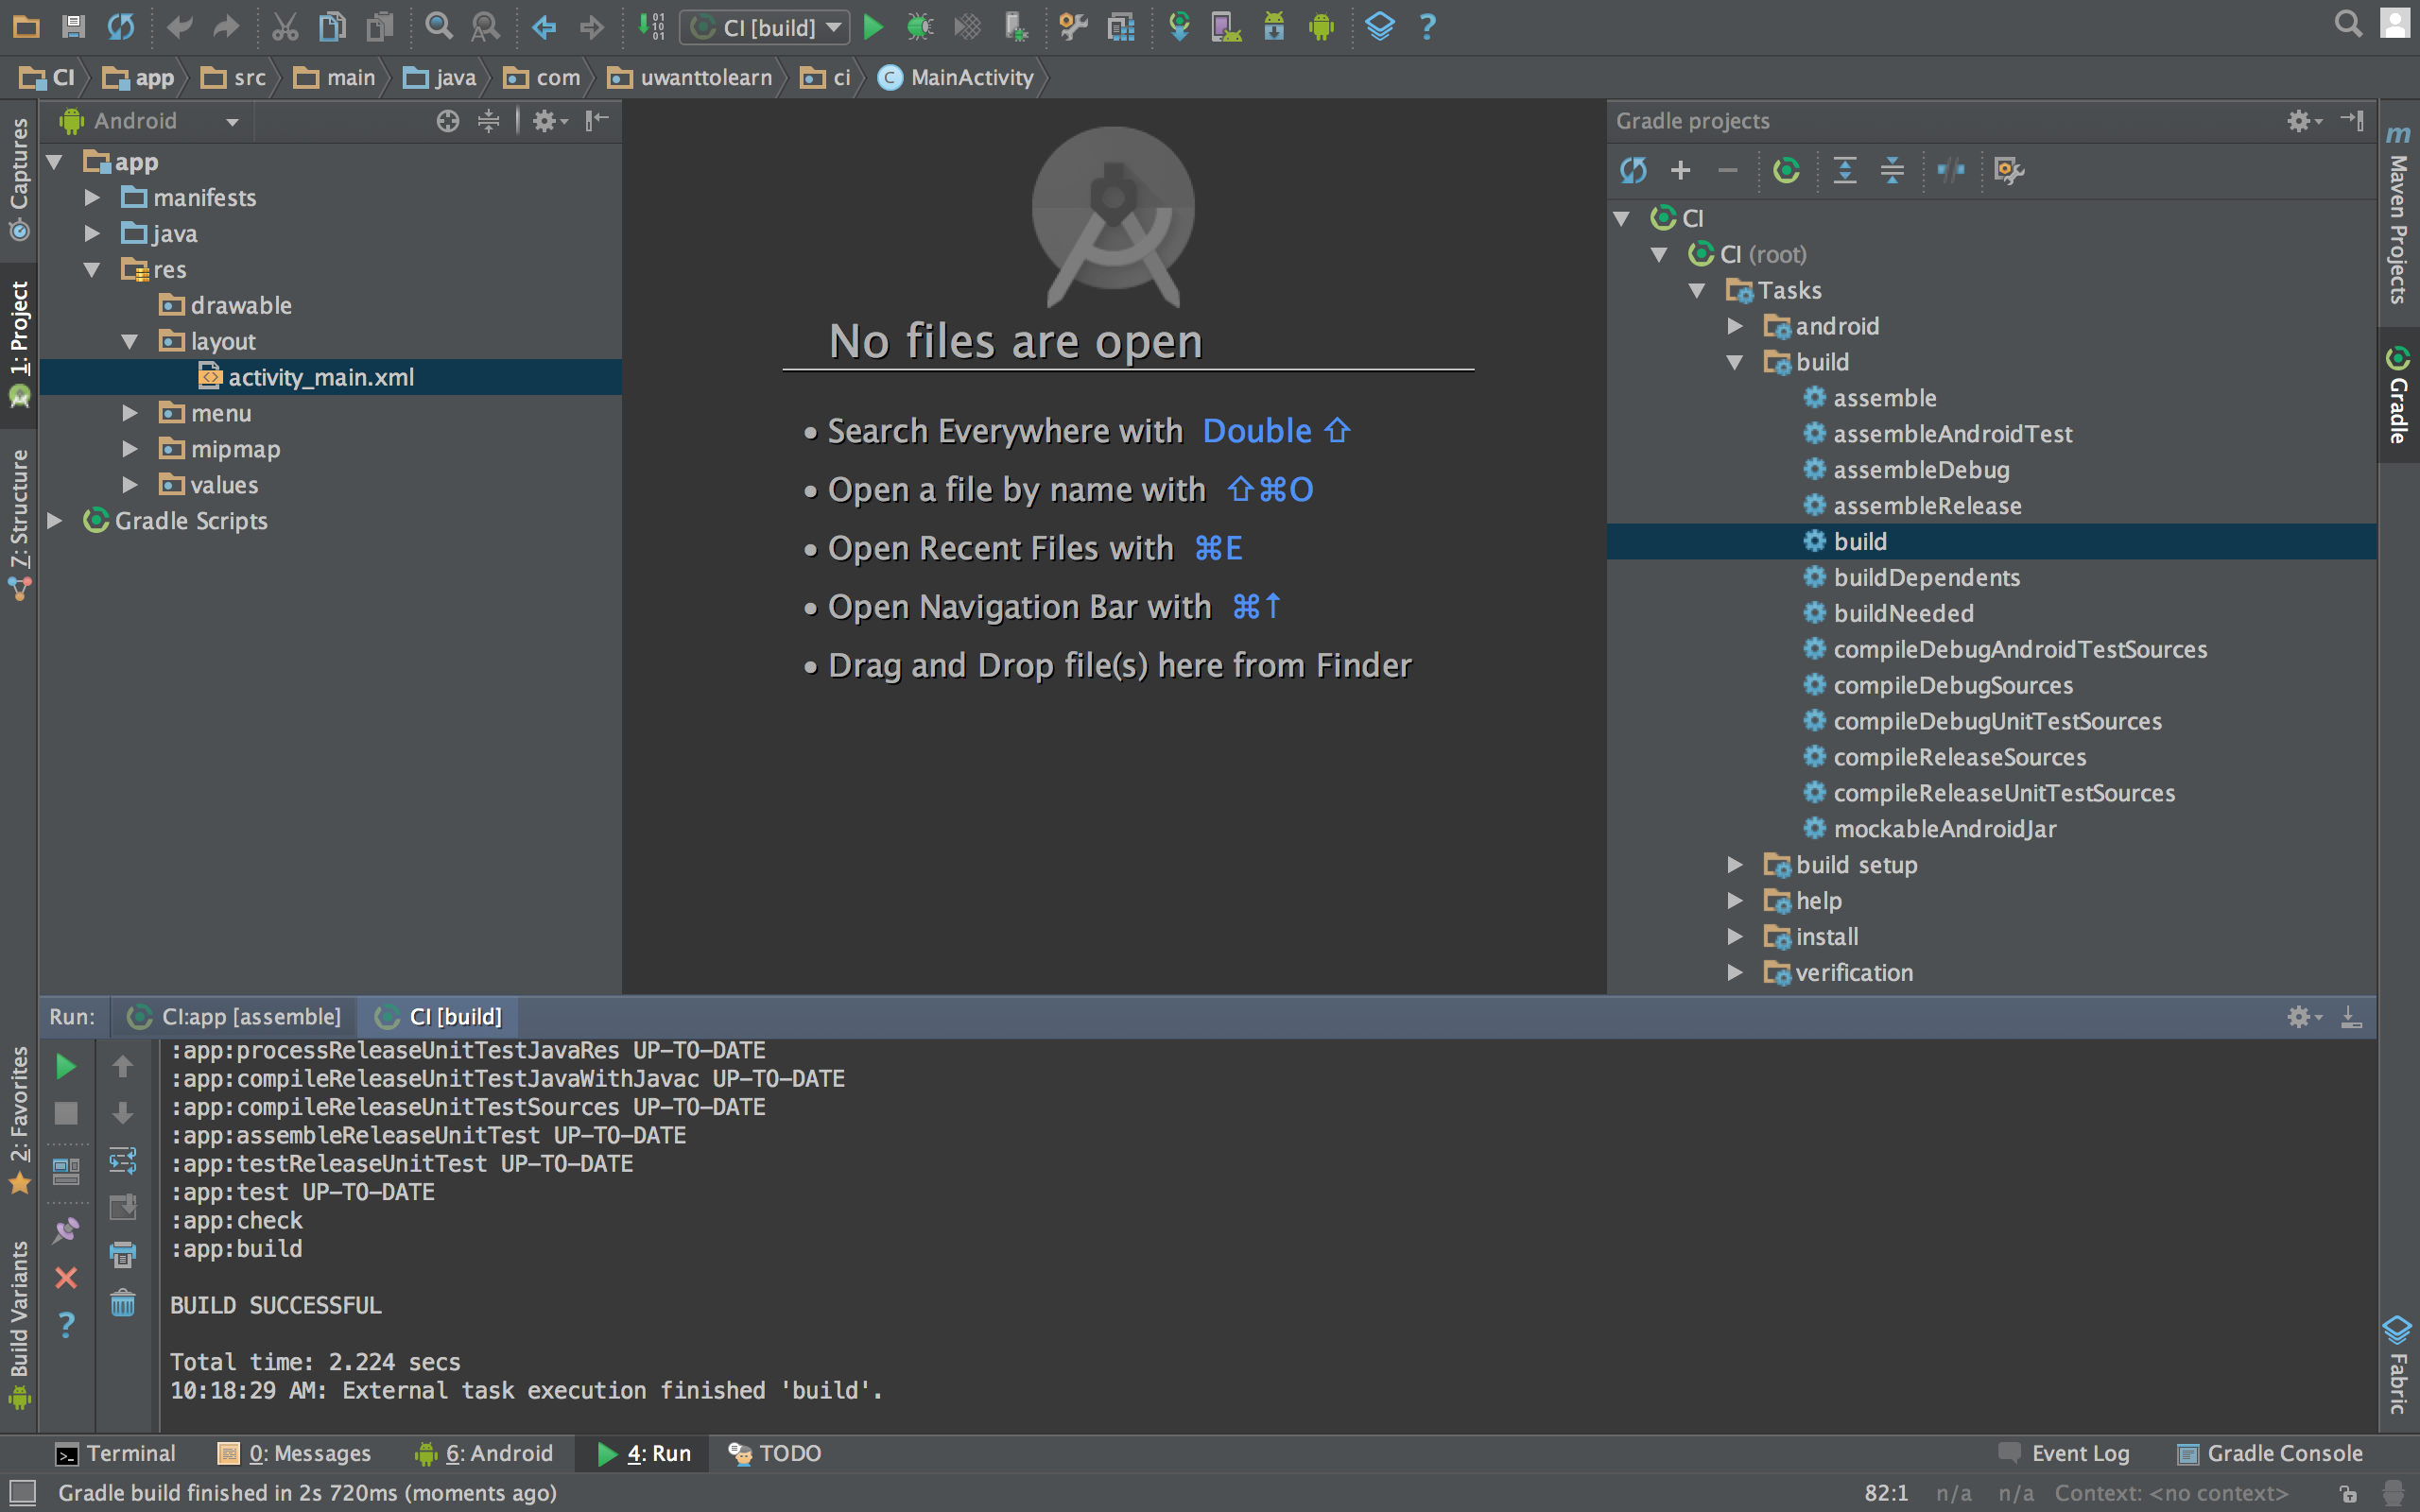
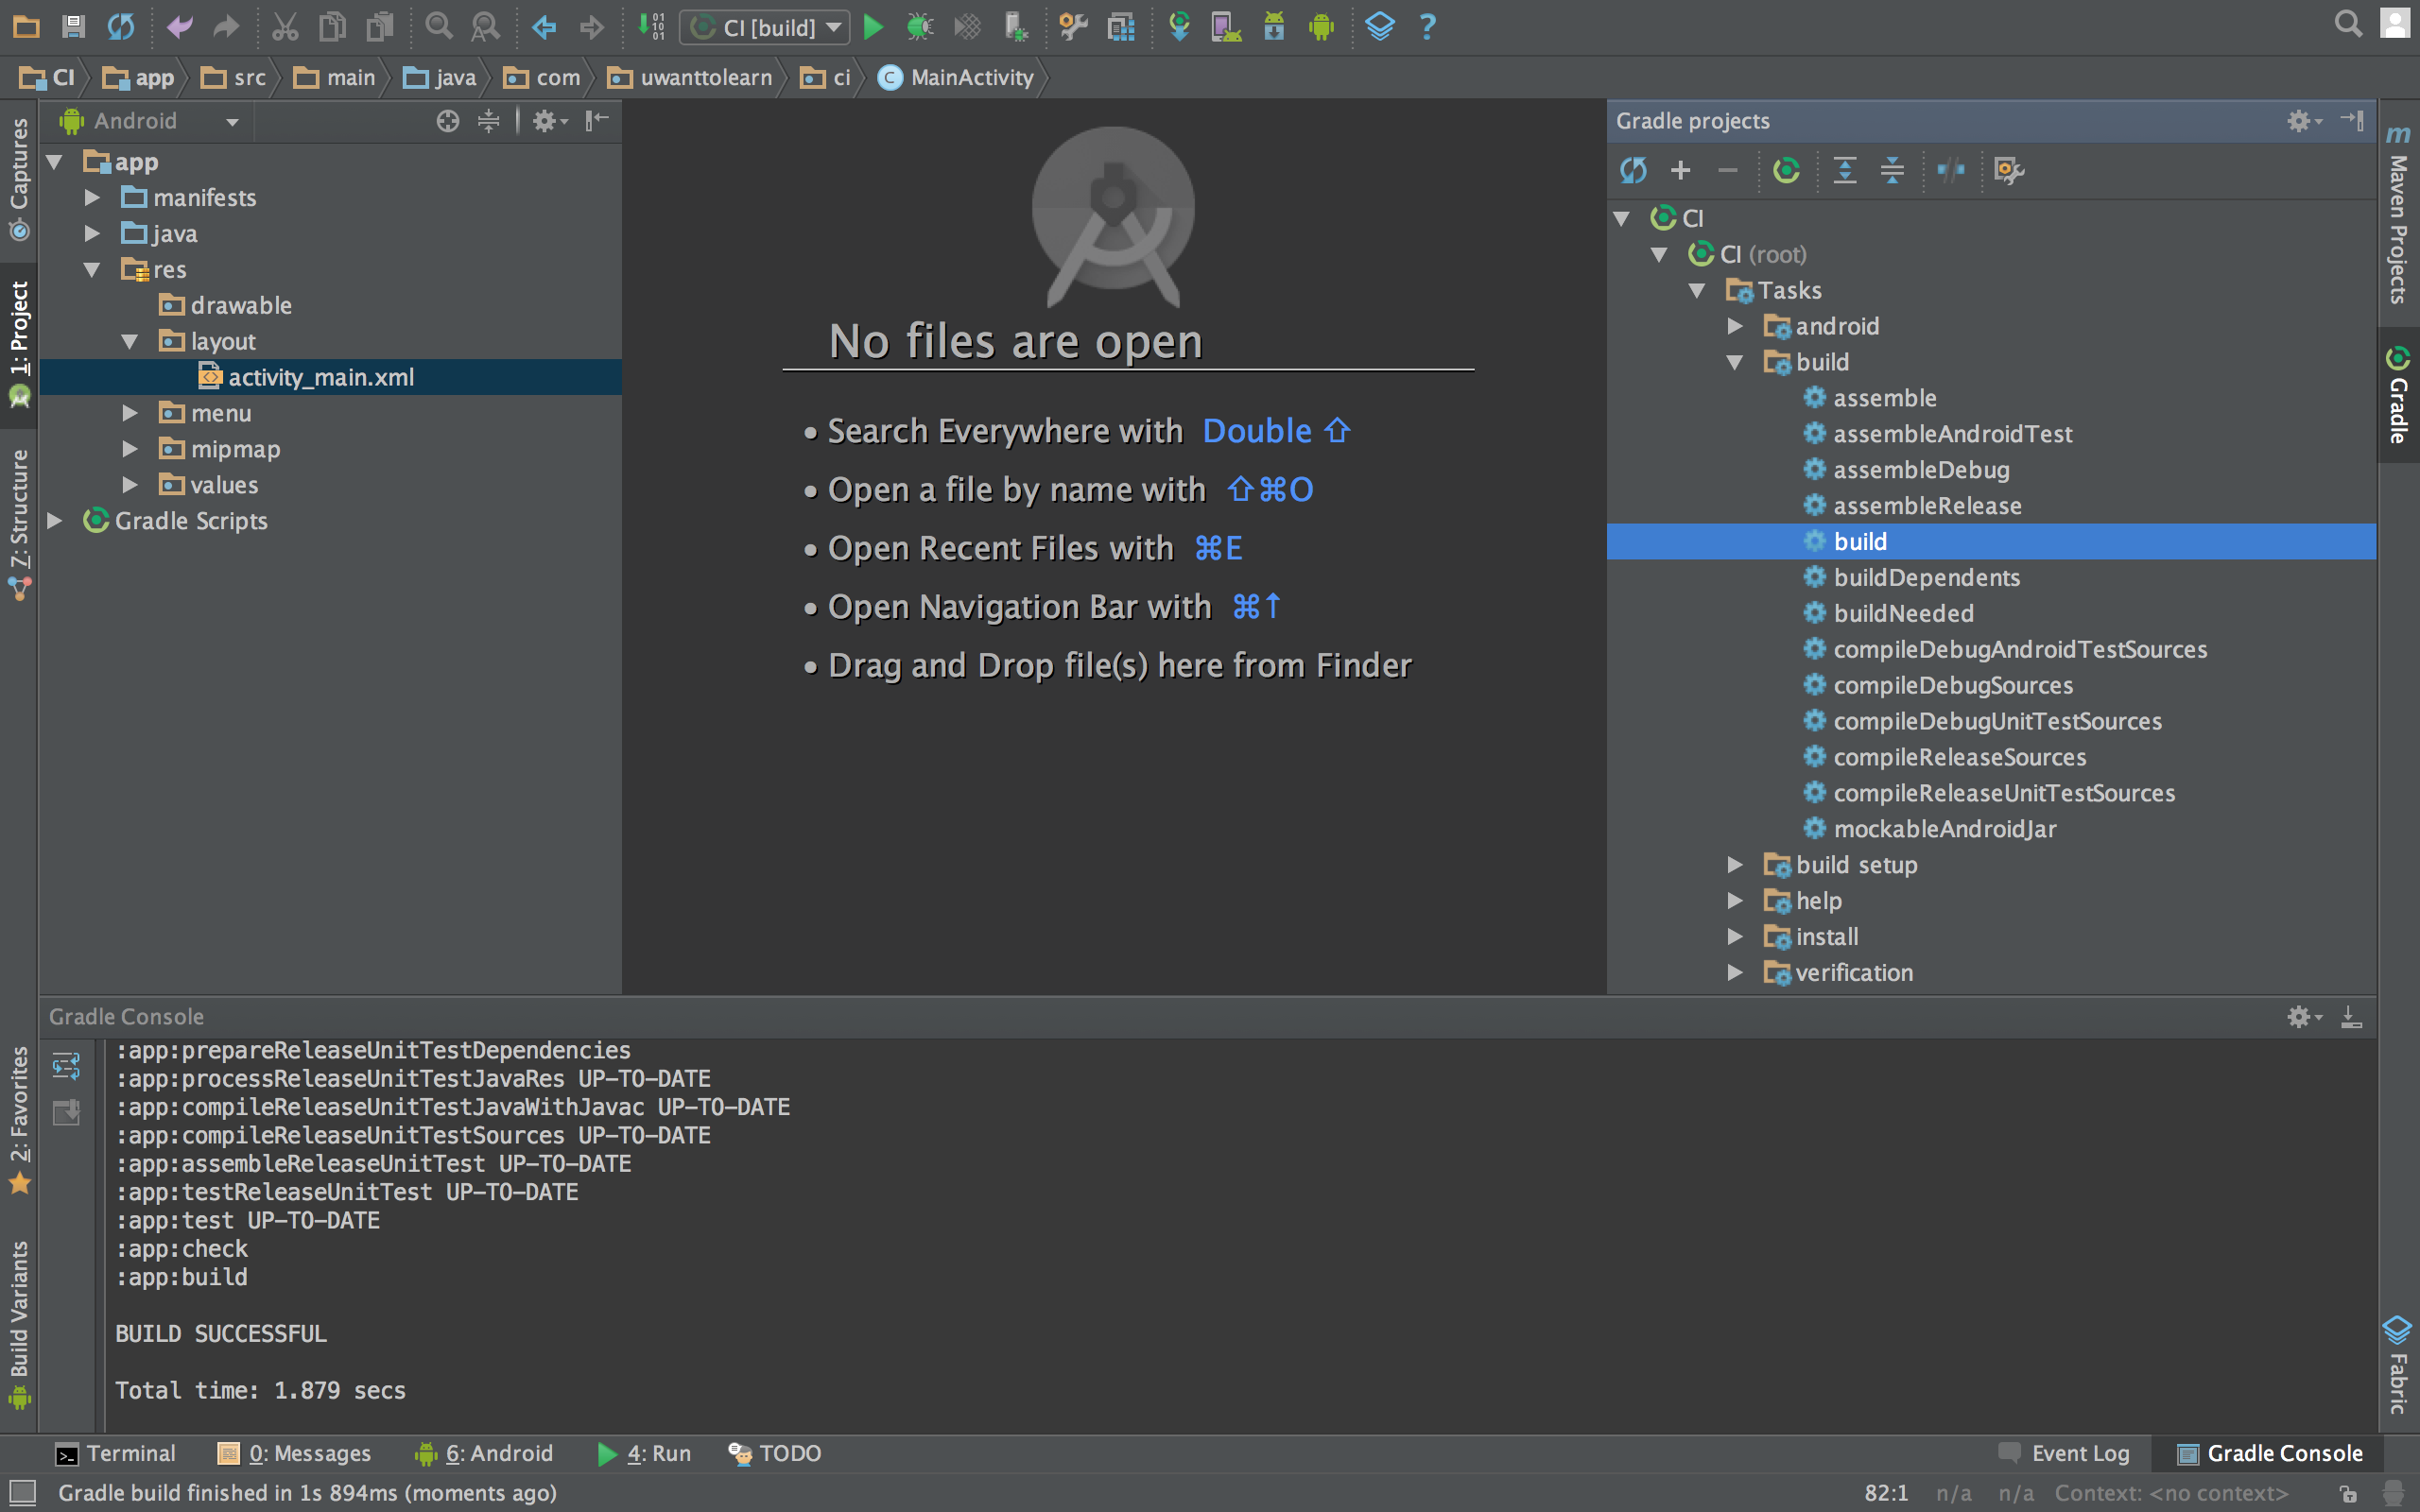
No error so you got a build successful message. Same message which we get on run button clicking. If I want to know what things Gradle doing in background I can see all its activities in Gradle Console as shown in below image.
Up to this stage I think nothing tough instead nothing tough in life if you ready to learn :). Now I do not think you are bore so we start next step. Now question is again I am doing all these things in Android Studio. I am giving my commands (Task) in Android Studio but in start I tell you guys we can create builds by using terminal. So now need to get answer of this question in next part.
Ready for a long dive.
Step 3:
I am using Mac but you are on any machine open your Terminals or CMD and go into your project directories and check your path as shown in below image.

Next check which files you have in this directory and confirm are you in Android project.

Next check is your Gradle is properly working from terminal or CMD. If yes then ready for an enjoyment man.
 Wow my Gradle is working. 🙂 . Its time to build my project from outside of Android Studio. Run a simple command ./gradlew build and below images are the result.


I think its clear how build tools work. How Gradle works.
Now its time to forgot all my previous discussion about Build tools. So forgot and trust on me 🙂 .
Step 4:
Its time to make friendship with CI servers. I know many developers afraid from these words like Jenkins, Bamboo, Team city and many more. So in simple words they are CI servers which basically help us to make our self lazy as a developer. Yes there is a lot of range of these servers but in the end all are doing same work only some give more opportunity to make our self more lazy by giving some extra features 😛 .
So now I am choosing Bamboo its paid but you can use a trial version. I am using a trial version. So say Bamboo I am coming. 🙂
Download from link: https://www.atlassian.com/software/bamboo/download.

After complete downloading extract and start initial configuration. You can follow the instructions which are given on Bamboo website now I am also going to start following instructions but before that I will show you how directory looks after extraction.

Now follow the link https://confluence.atlassian.com/bamboo/installing-bamboo-on-mac-os-x-289276789.html

After following all steps. Now Tomcat start working successfully. Open this link in your browser. http://localhost:8085/setup/setupLicense.action and you will see a page where you need to add your trial license.

For license you need to login into atlassian website.
https://id.atlassian.com/login
After login create a new license key by clicking “New Evaluation License”.

After adding License key click express installation and wait. After some seconds he will ask you to add credentials for server access. Add these and again wait for seconds and you will see the webpage like shown below.
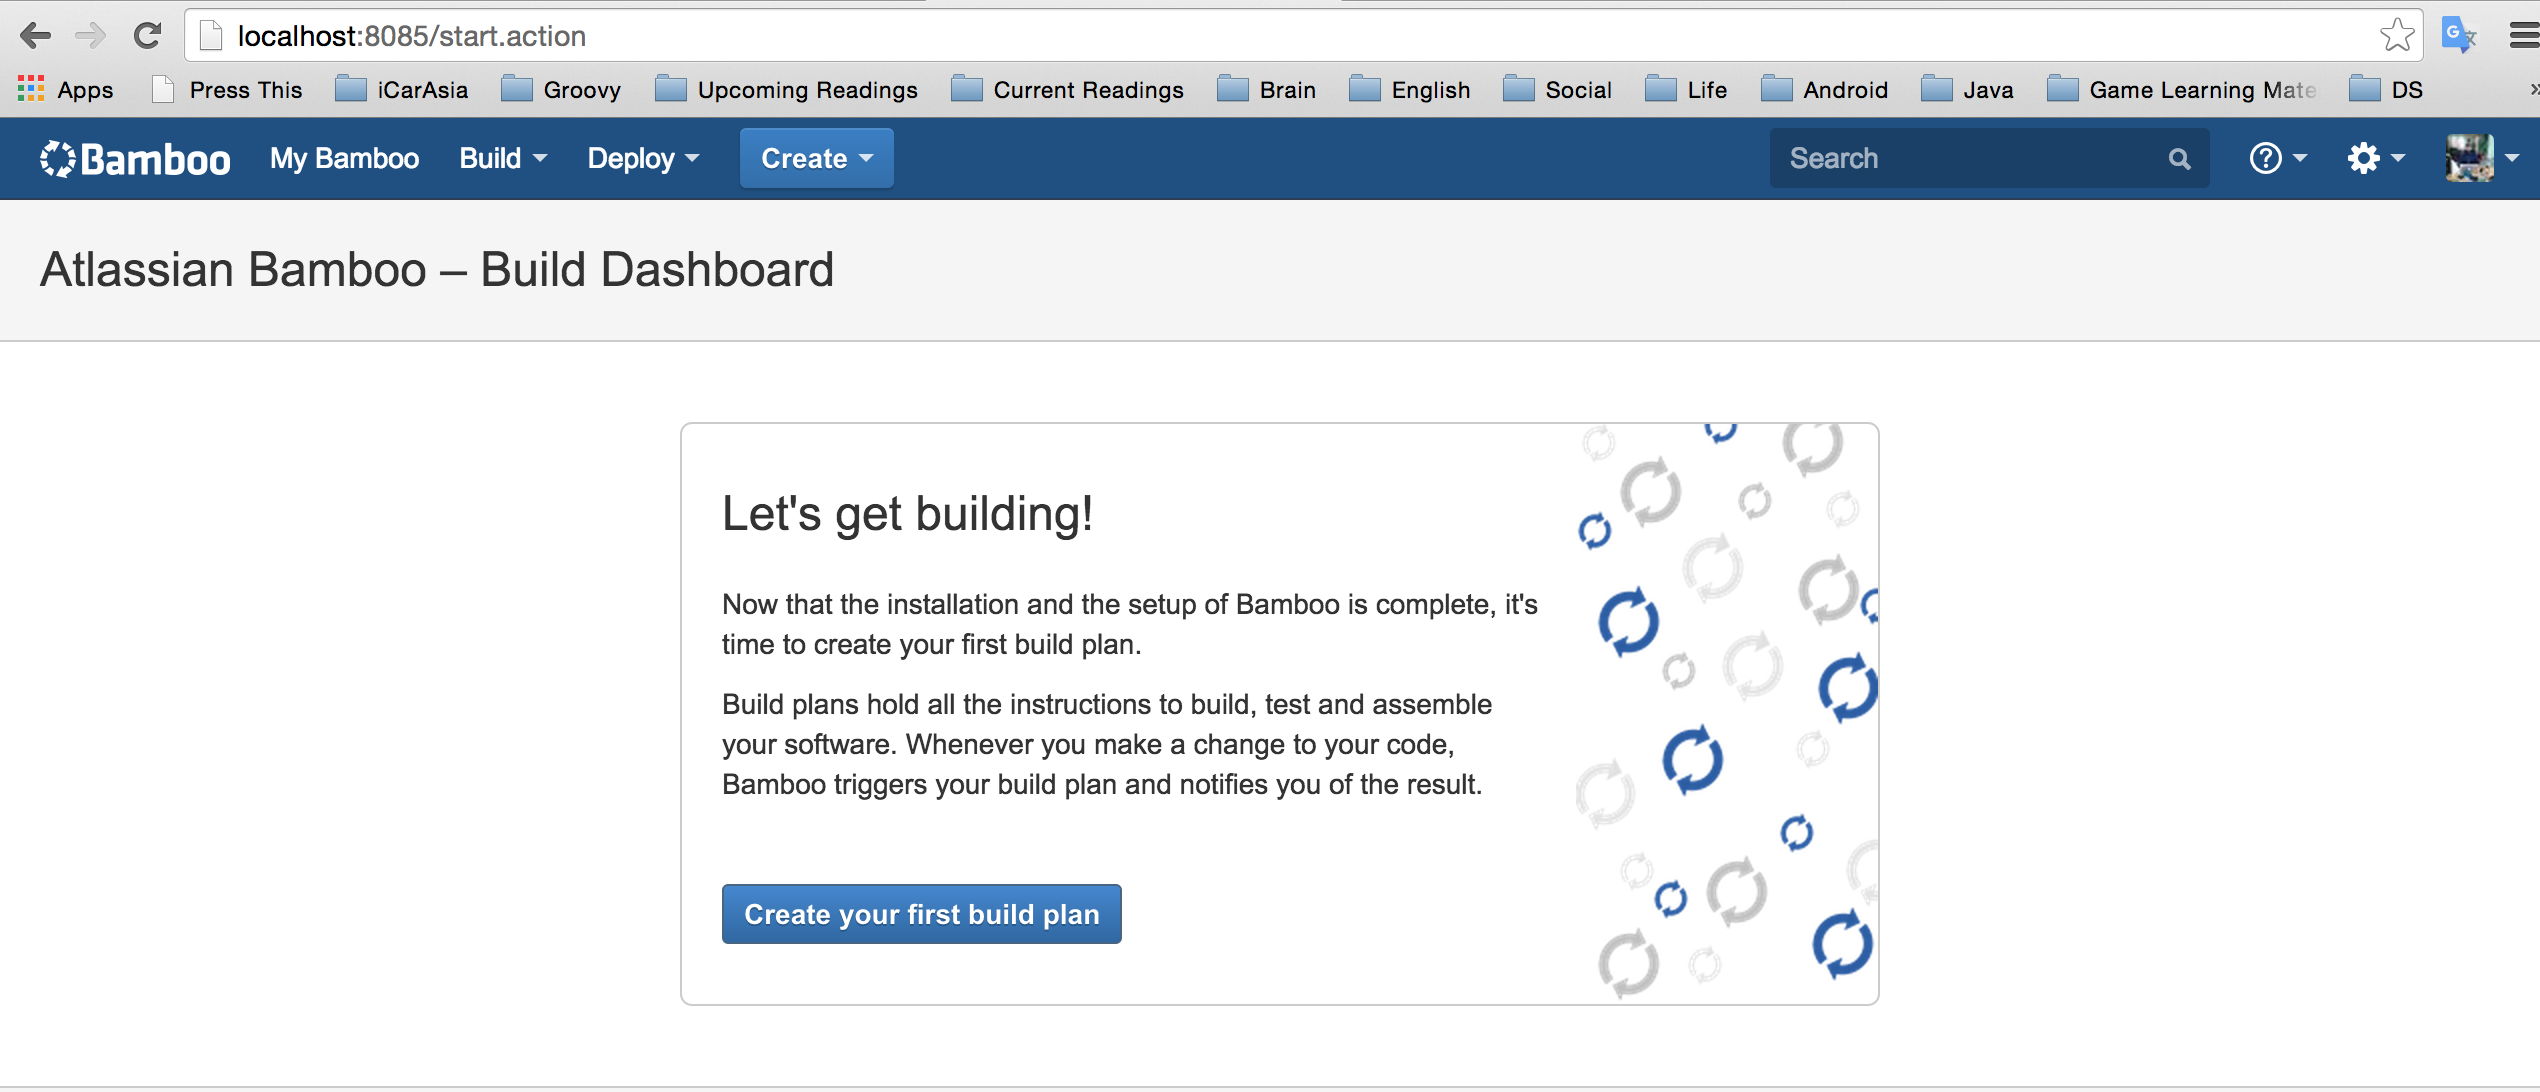
Now Click on Create your first build plan. You need to fill a form of Configure plan. In this tutorial I am selecting GitHub as VCS. So now we need to make a one new public project on GitHub and push our CI Android project code there. So do that and come back I am waiting for you guys……………..
You can check the below link for my CI project.
https://github.com/Hafiz-Waleed-Hussain/AndroidCI

Now click on Configure Plan button. After completion of this task you will see the most important screen on your browser as shown below.
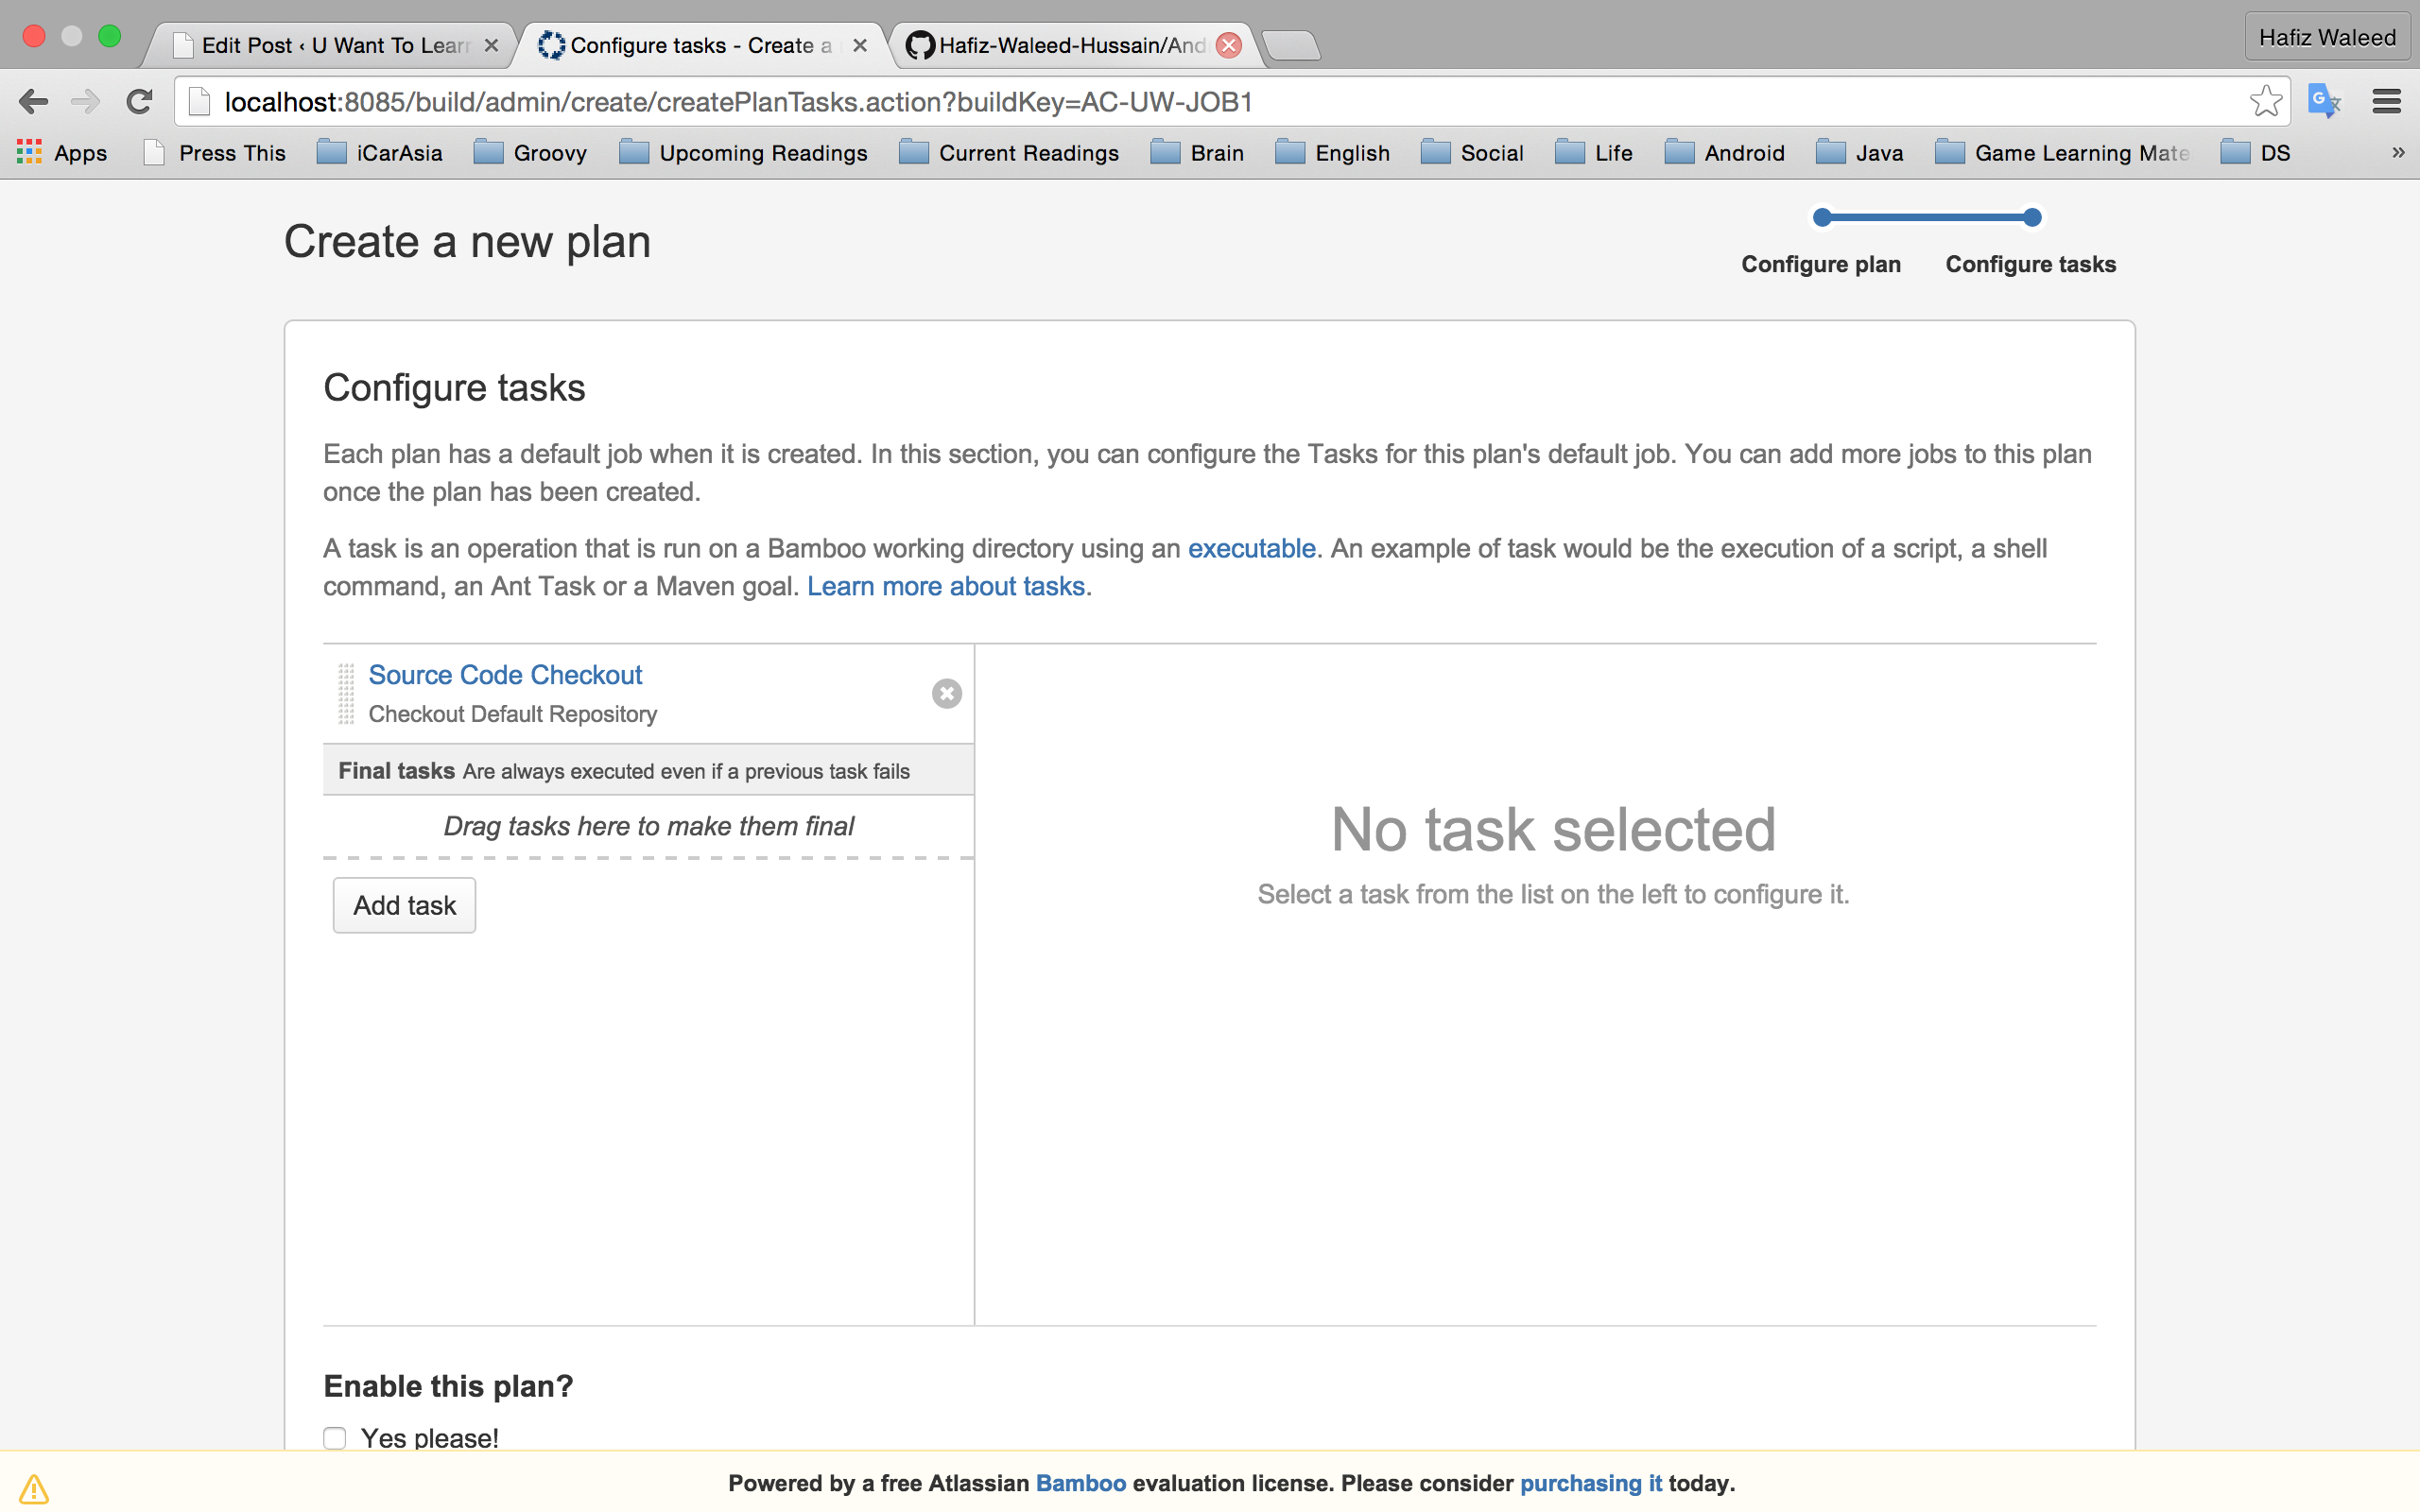
Now click on Add Task button and search script in search box as shown below.
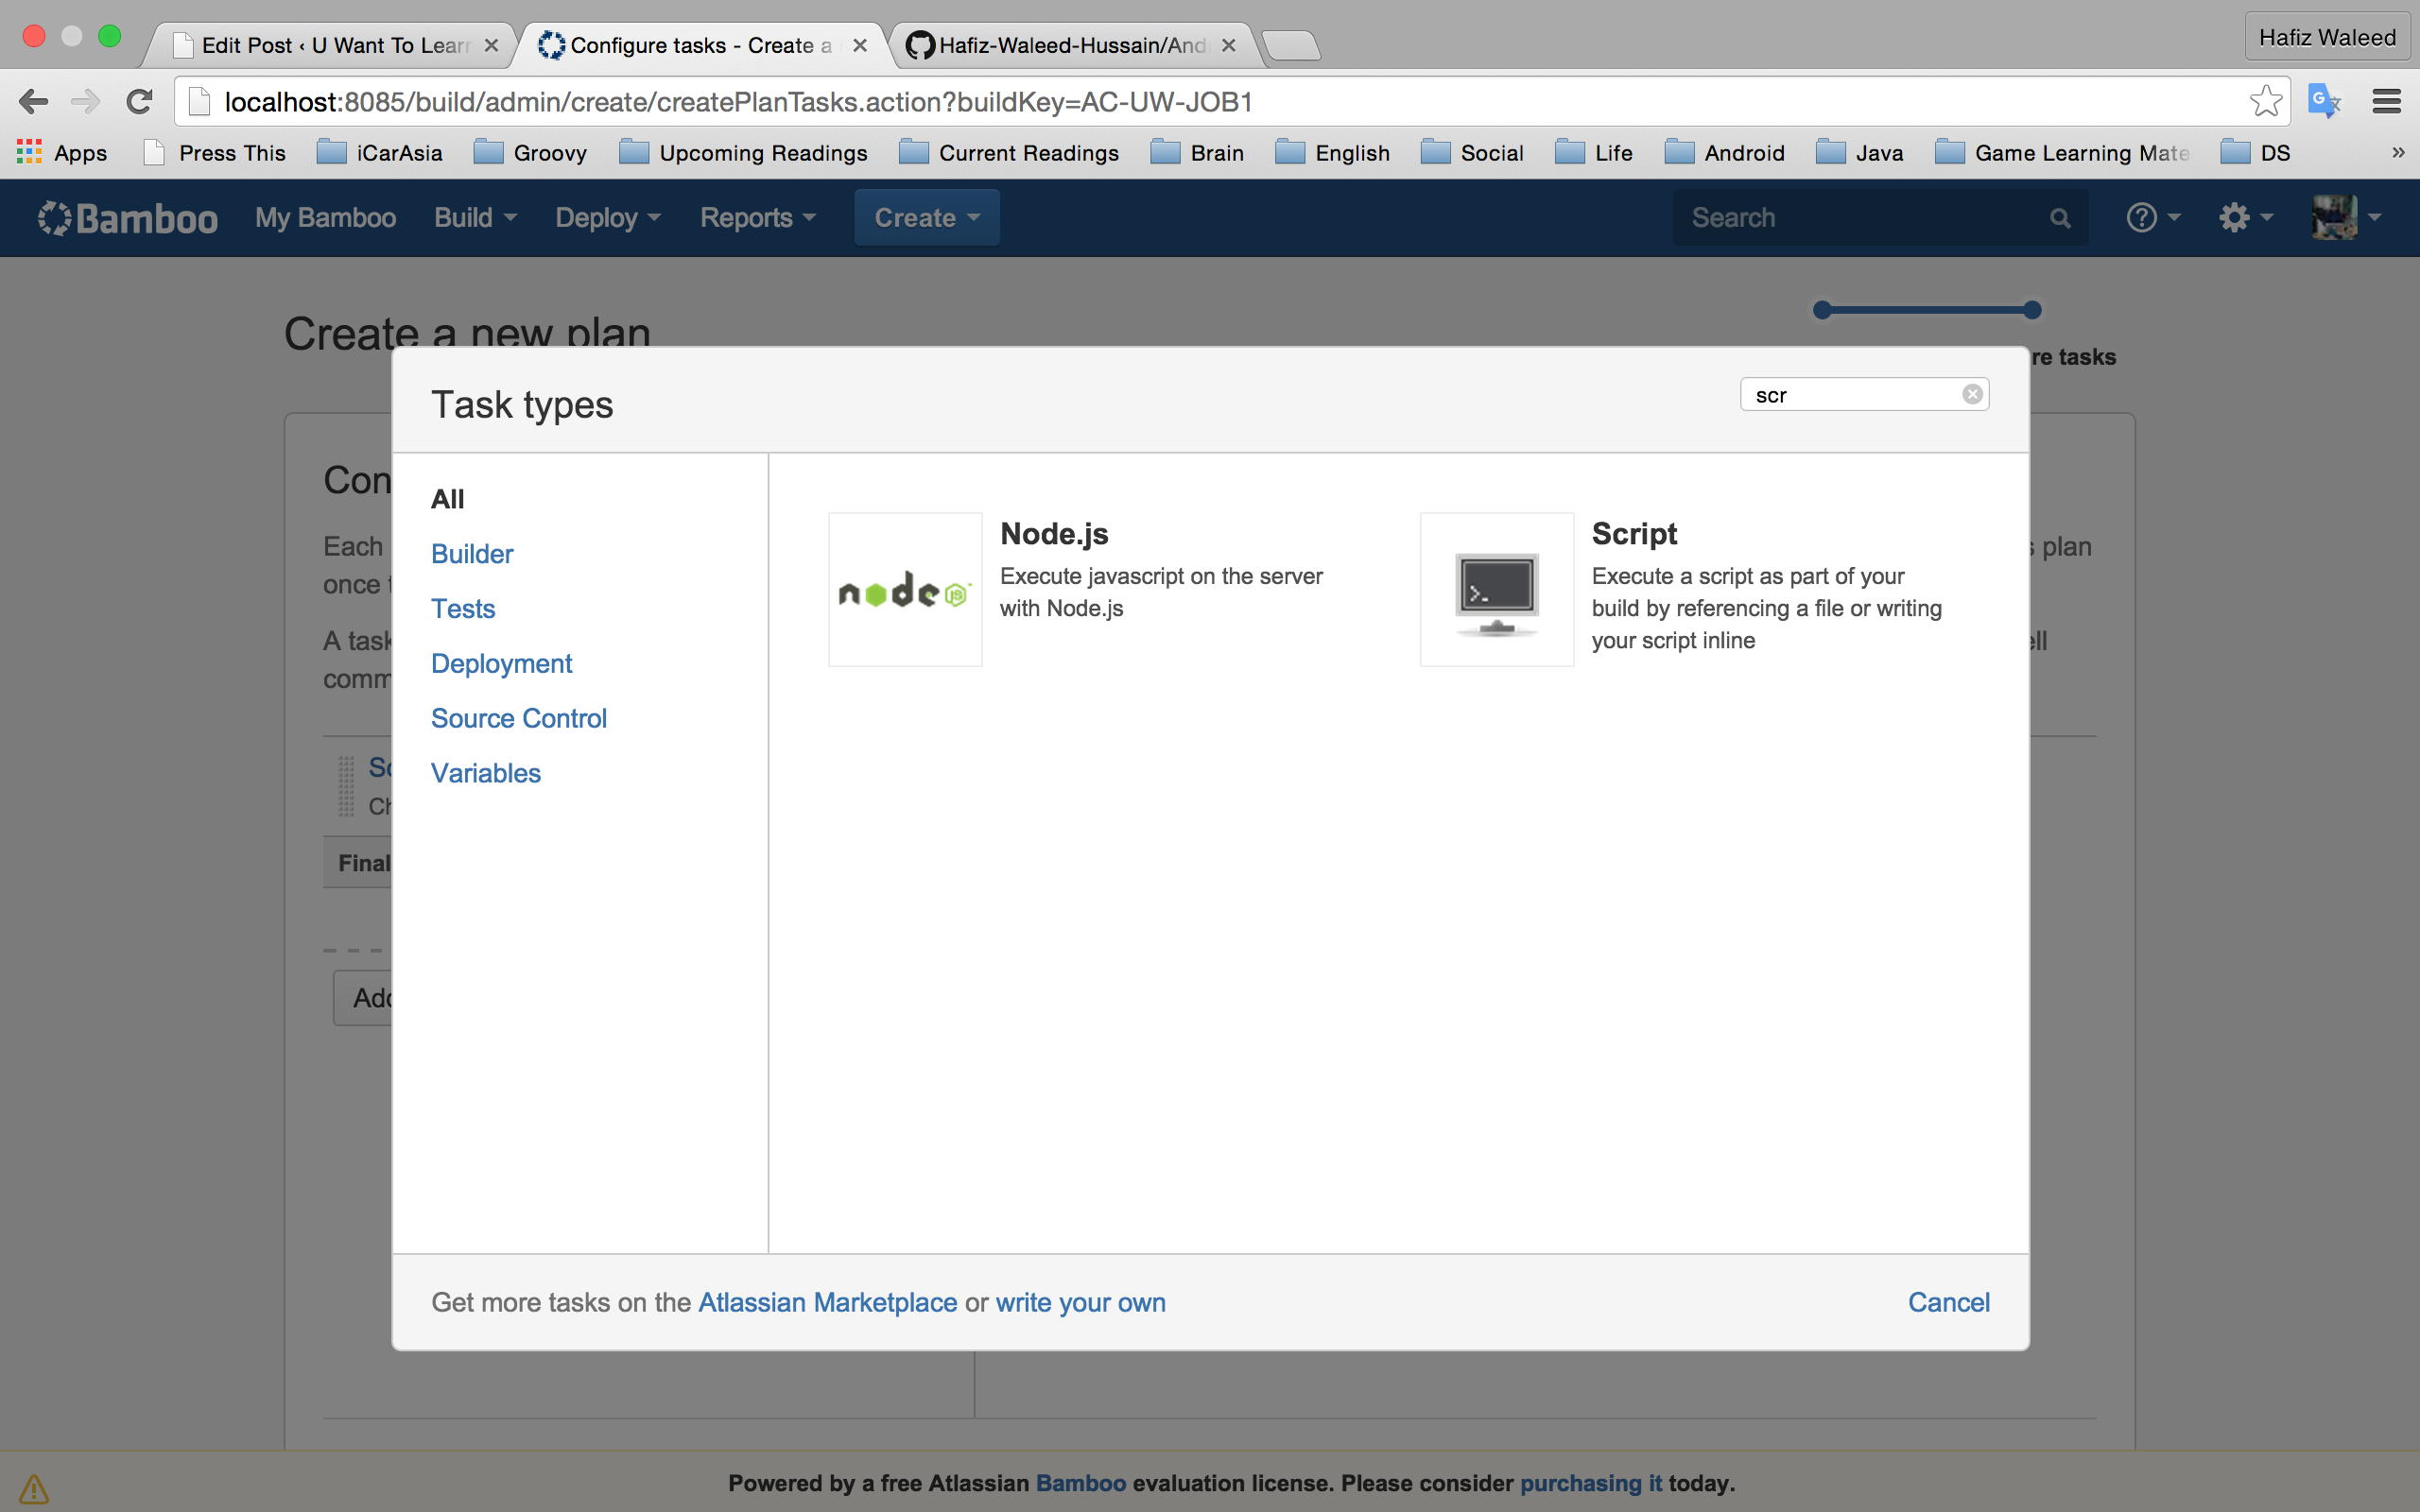
Script creation showing below.
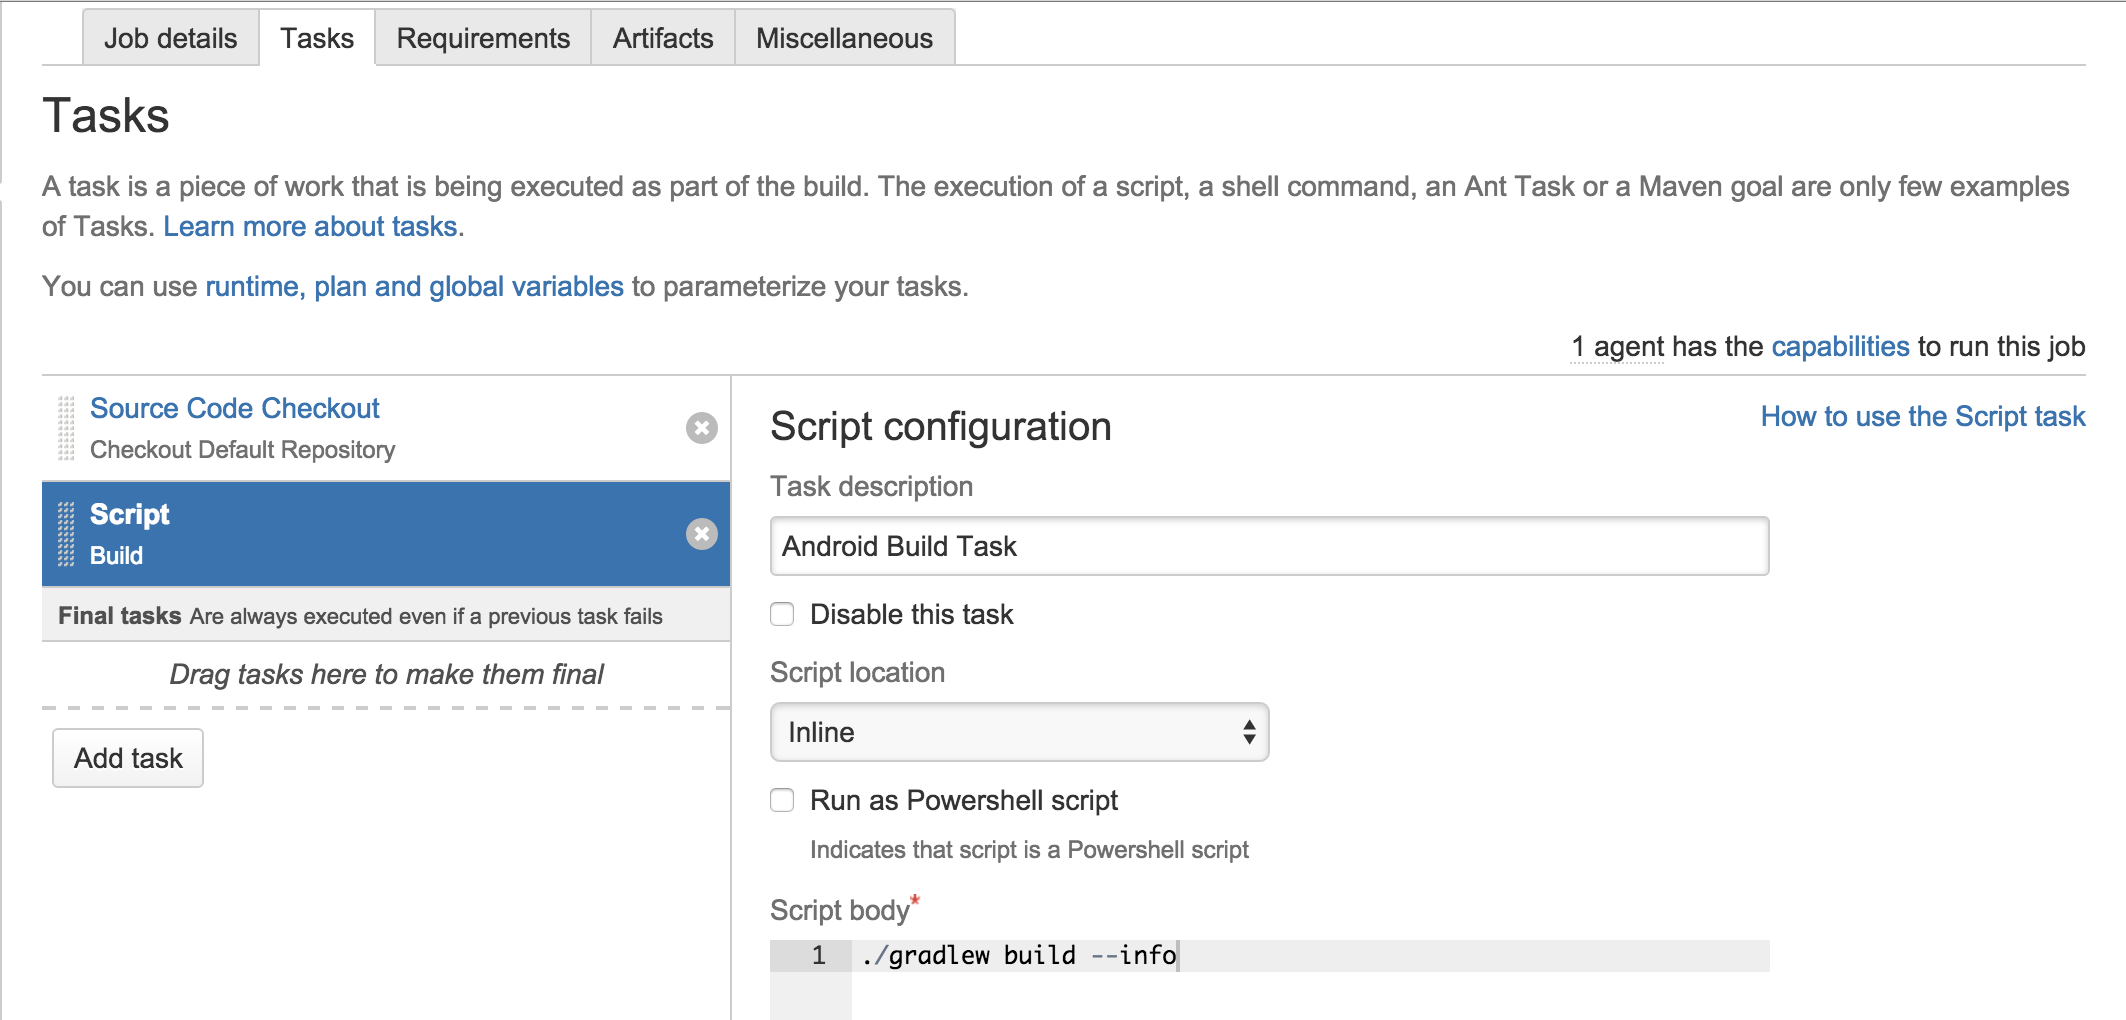

Hurray CI completed now its time to run our build first manually on Bamboo Server.


Now its time to do one test. Now go into edit settings and select the trigger tab and do your polling time to one second and save and after that do a one single line change in code and push and after that check CI server automatically start script of build. Its awesome.
 To confirm is script start automatically for that open history of your build and check that you easily determine which are run manually and which build run by change.

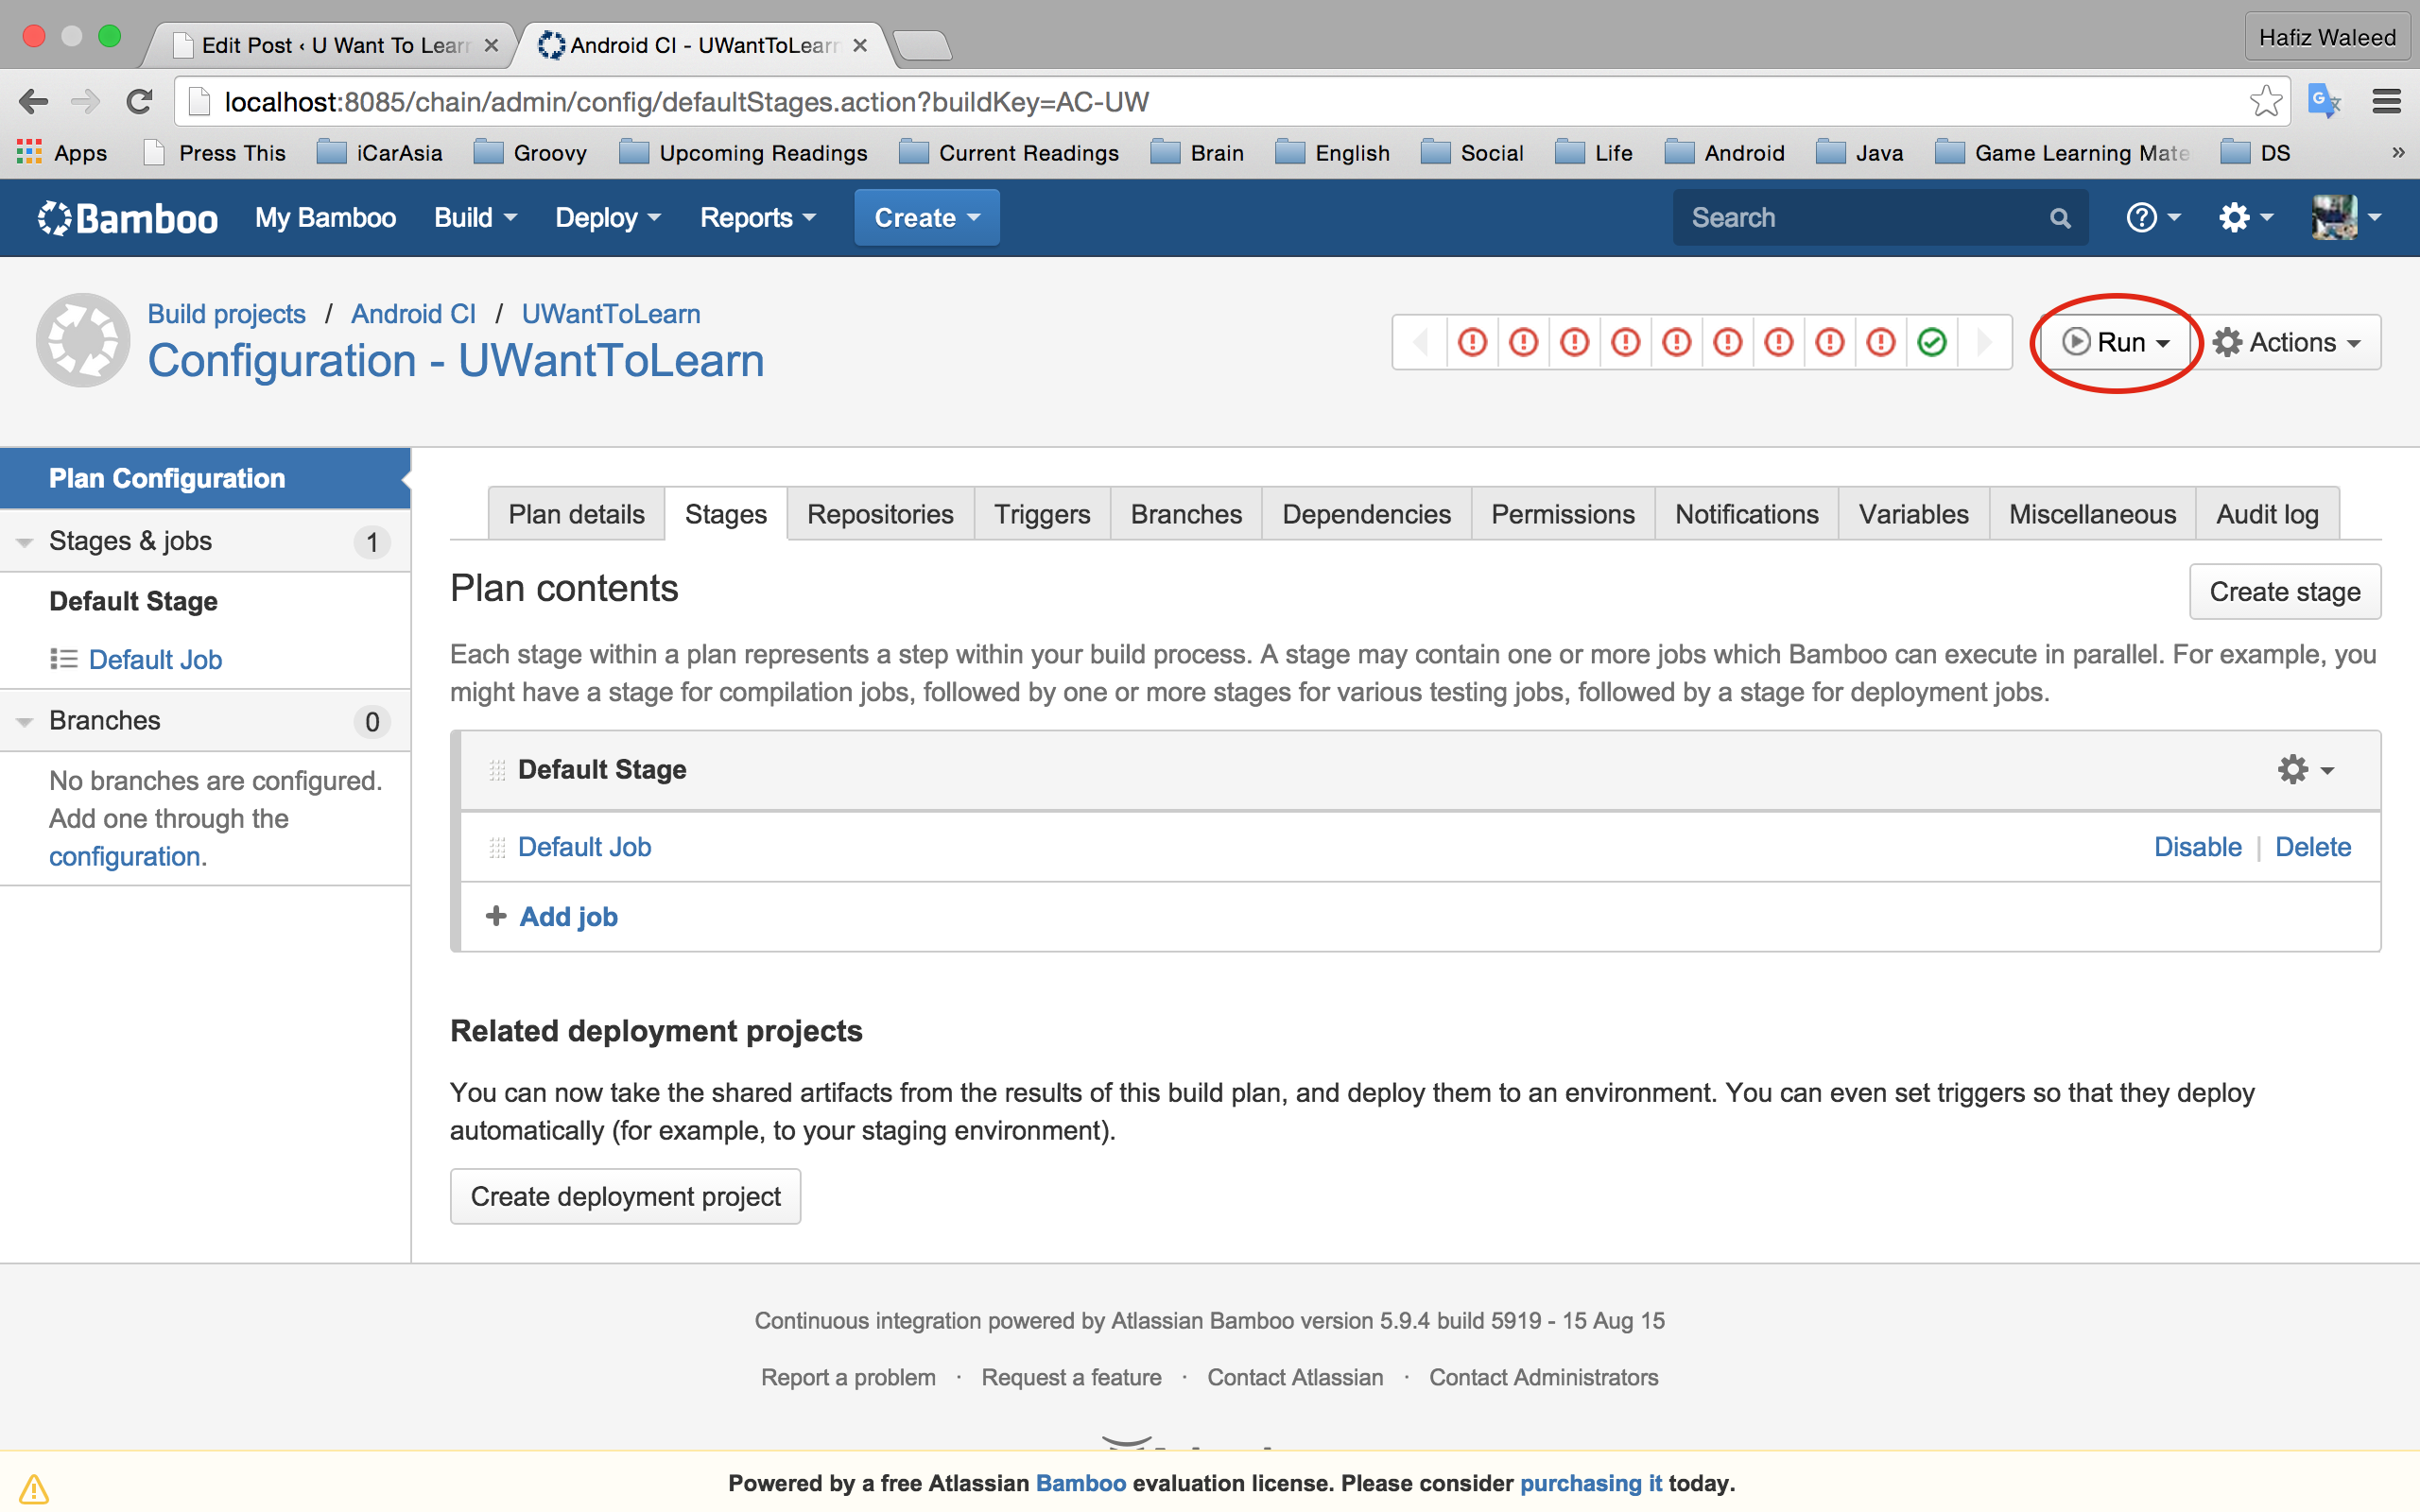
You can do many things from this stage which we will discuss in next post.
Last thing now I am pushing one code with error so we need to test what happen in this case.
Basically I remove a semicolon and push the code 🙂 . So its time to see what happened with our build.


Now I only want to say sorry because from now you are going to make your self more lazy developer. 🙂
OK Buddies BYE.
[ Hi Friends, I started a new series of ” ( Case Study for Android CI -> CD -> CD = Continuous * ( Integration, Delivery, Deployment ) ” Check this one. In this, I am using Jenkins as CI server. ]
Super Awesome .. You have instilled my interest in learning CI ..
Thanks a lot!
Thank you for Appreciation.
Really Nice Explanation (Y) (Y) (Y)
Thank you for Appreciation.
Where is the apk located
Hi Shalin,
I have one more series of CI, CD for Android. If possible please read that one, that is more clear and will give all the answers to your questions.
https://www.uwanttolearn.com/android/case-study-android-ci-cd-cd-continuous-integration-delivery-deployment-part-1/