
WOW, we got one more day so it’s time to make this day awesome by learning something new. ?
Hello friends, hope you are doing good. First, I want to say thank you. I got a lot of appreciation from my junior and senior community fellows on a different platform for my first part. For that again, I am really thankful to you guys. My main purpose is what I know you guys should know vice versa is also true :). We already have a plan in part1 so it’s time to follow that plan in this part2.
Motivation:
Here motivation is same which I already shared with you guys in part1.
Plan:
So, for my readers below is my plan for this case study.
- Part 1
Optional PrerequisitesWhat is Continuous Integration ( CI), Continous Delivery ( CD), Continous Deployment ( CD )?Version control system ( VCS )Continuous integration serverBuild System
- Part 2
- Application code on Github
- Git structure for the code
- Unit Tests
- Functional Tests
- Gradle build system and it’s commands
- Jenkins integration
- Part 3
- Webhook
- Unit Test Report
- Code coverage report
- Lint rules ( Skip )
- Artifacts
- Release notes
- Part 4
- Functional / UI / Espresso Unit Test Report
- Functional / UI / Espresso Unit Test Code Coverage Report
- Notifications may be on slack, hip chat
- Deliver APK using email
- Deliver APK using Fabric
- Deployment on play store beta
- Tag creation after publish
- Merge code with the master branch
- Part 5
- Case study ( App has three different flavors )
- Git structure for the code
- Unit Tests
- Functional Tests
- Acceptance Tests
- Gradle build system and it’s commands
Application code on Github:
For this part, a code is available on Github branch part2. In this code, I added one LoginActivity.kt file and my this whole part depends upon this file. Before going to show you code and little explanation of that code. I am going to share with you some important points which you should know before diving into the code.
- This code is written in Kotlin language.
- In Kotlin we can write a whole app in one file. I know that is not a good practice but for this tutorial, I am using one file LoginActivity.kt.
- This LoginActivity is the following MVP. ( I am not going to explain here what is MVP but by using this pattern I will show you some real unit tests which are independent of Android OS API’s).
- Unit Tests are written in Kotlin.
- Functional Tests are written in Kotlin.
It’s time to show you our code class:
package uwanttolearn.dagger2.java.login

import android.content.Intent
import android.os.Bundle
import android.support.v7.app.AppCompatActivity
import android.view.View
import android.widget.EditText
import android.widget.Toast
import uwanttolearn.dagger2.R
import uwanttolearn.dagger2.java.home.HomeActivity

/**
 * Created by waleed on 20/03/2018.
 */

// Top Level and Extension functions
inline fun <reified T> AppCompatActivity.startActivityWithFinish() {
    finish()
    startActivity(Intent(this, T::class.java))
}


// LoginActivity
class LoginActivity : AppCompatActivity(), LoginViewContract {

Below code is really awesome. Everything is easy except lazy if you are new to kotlin. So, here I am using Kotlin delegate lazy. Benefit og this

    private val presenter: LoginPresenter by lazy { LoginPresenter(this, LoginRepo()) }
    private val usernameEditText: EditText by lazy { findViewById<EditText>(R.id.LoginActivity_username_edit_text) }
    private val passwordEditText: EditText by lazy { findViewById<EditText>(R.id.LoginActivity_password_edit_text) }


    override fun onCreate(savedInstanceState: Bundle?) {
        super.onCreate(savedInstanceState)
        setContentView(R.layout.activity_login)
    }


    fun onLoginClick(v: View) = presenter.onLoginClick(usernameEditText.text.toString(),
            passwordEditText.text.toString())


    override fun showEmptyUsernameError() = showToast(getString(R.string.enter_username))

    override fun showEmptyPasswordError() = showToast(getString(R.string.enter_password))

    override fun showSomethingWentWrong() = showToast(getString(R.string.something_went_wrong))

    override fun startHomeActivity() = startActivityWithFinish<HomeActivity>()

    private fun showToast(text: String) = Toast.makeText(this, text, Toast.LENGTH_SHORT).show()
}


// Contract between UI and Presenter.
interface LoginViewContract {
    fun showEmptyUsernameError()
    fun showEmptyPasswordError()
    fun startHomeActivity()
    fun showSomethingWentWrong()
}


// Presenter
class LoginPresenter(private val view: LoginViewContract, private val repo: LoginDataSource) {

    fun onLoginClick(username: String, password: String) = with(view) {
        when {
            username.isEmpty() -> showEmptyUsernameError()
            password.isEmpty() -> showEmptyPasswordError()
            repo.doLogin() -> startHomeActivity()
            else -> showSomethingWentWrong()
        }
    }

}


// Data Source and Repo

interface LoginDataSource {
    fun doLogin(): Boolean
}

class LoginRepo : LoginDataSource {
    override fun doLogin(): Boolean {
        // API call
        return true
    }

}
I hope the code is easy for everyone. For those who are new to Kotlin for them, I am going to explain above code. Other readers can skip this part.
SKIP
// Top Level and Extension functions
inline fun <reified T> AppCompatActivity.startActivityWithFinish() {
    finish()
    startActivity(Intent(this, T::class.java))
}
Before going to explain above code block. In Kotlin we have top-level functions. Means functions without any class and accessible anywhere just like a global function. They are good but abuse of these functions may create a lot of difficulty for your team members. So anytime you want to use this feature of Kotlin. Try to create a code of conduct with your Team lead. How you guys are going to use this feature. In this way, everyone will be on the same page.
Now about our code block. That is a top-level extension function. You can read more about Extension function I am using here only to show you some new directions in Kotlin if you don’t know. Otherwise, I don’t think I need to use this code block here. As a conclusion, I can use startActivityWithFinish() function in all my activities classes. Which will do a finish my current activity and will start a new activity whose name I will give to Diamond operator.
class LoginActivity : AppCompatActivity(), LoginViewContract {

    private val presenter: LoginPresenter by lazy { LoginPresenter(this, LoginRepo()) }
    private val usernameEditText: EditText by lazy { findViewById<EditText>(R.id.LoginActivity_username_edit_text) }
    private val passwordEditText: EditText by lazy { findViewById<EditText>(R.id.LoginActivity_password_edit_text) }


    override fun onCreate(savedInstanceState: Bundle?) {
        super.onCreate(savedInstanceState)
        setContentView(R.layout.activity_login)
    }


    fun onLoginClick(v: View) = presenter.onLoginClick(usernameEditText.text.toString(),
            passwordEditText.text.toString())


    override fun showEmptyUsernameError() = showToast(getString(R.string.enter_username))

    override fun showEmptyPasswordError() = showToast(getString(R.string.enter_password))

    override fun showSomethingWentWrong() = showToast(getString(R.string.something_went_wrong))

    override fun startHomeActivity() = startActivityWithFinish<HomeActivity>()

    private fun showToast(text: String) = Toast.makeText(this, text, Toast.LENGTH_SHORT).show()
}
Above is our LoginActivity code which is extending to our LoginViewContract between Presenter and View ( UI or Activity ). (MVP)
First, need to discuss lazy keyword.
As you can see I am using lazy three times in our code to initialize fields. In Kotlin “lazy” is a delegate property. By using this one I am saying to the compiler. Please don’t initialize my field or property at the start of the activity instead once I will try to use first time than first time call lazy block and start using this field. For example in EditText case. I am not initializing in onCreate() instead as user will click onLoginClick(). Then I will do the first-time findViewBy and I will get username.toString(). If a user will click again now lazy will take care this time this field will not initialize again. That is a really good feature but you need to use with care.
Next, I am implementing LoginViewContracrt methods.
interface LoginViewContract {
    fun showEmptyUsernameError()
    fun showEmptyPasswordError()
    fun startHomeActivity()
    fun showSomethingWentWrong()
}
That is simple. No need for explanation.
class LoginPresenter(private val view: LoginViewContract, private val repo: LoginDataSource) {

    fun onLoginClick(username: String, password: String) = with(view) {
        when {
            username.isEmpty() -> showEmptyUsernameError()
            password.isEmpty() -> showEmptyPasswordError()
            repo.doLogin() -> startHomeActivity()
            else -> showSomethingWentWrong()
        }
    }
}
Again this code is really simple. No need for explanation. If you don’t know ‘when’ is a keyword in Kotlin. So that is something like a ‘switch’ keyword in java but more powerful then switch.
interface LoginDataSource {
    fun doLogin(): Boolean
}

class LoginRepo : LoginDataSource {
    override fun doLogin(): Boolean {
        // API call
        return true
    }
}
Above code is a Repository Pattern for data sources.
Git structure of our code:
For this part. I am going to use very simple Git structure as shown below:
![]()
So before going to explain how I will use this structure. I want to share with you one term which I will use interchangeably in a perspective of Jenkins.
build – pipeline – project: Those who are new on Jenkins we will create an item to implement our Continuous Integration, Continuous Delivery, and Continuous Deployment. That item is called build. But sometime’s people used term project or pipeline basically pipeline is not a proper word. But for now, that will be ok. So, anytime I will use build you can imagine a configuration for Continuous Integration, Continuous Delivery, and Continuous Deployment. I will show you again this once I will start Jenkins integration.
Now, I have a plan to make an immature process for Continuous Integration, Continuous Delivery, and Continuous Deployment. So, for that, I am going to create 2 builds on Jenkins. One will be called DebugBuild and second one will be called ReleaseBuild.
DebugBuild: That will contain Continuous Integration and Continuous Delivery.
ReleaseBuild: That will contain Continuous Integration, Continuous Delivery, and Continuous Deployment.
Everything will be clear as I will go to next topic so please do not take tension if you are confused. Only remember the terms which I shared with you.
Now back to git branch structure.
master: This branch will be attached to our ReleaseBuild. it’s mean any time we will publish our build into a Play store beta channel. That will use this branch and after successful deployment, Jenkins will create a tag from this branch. Second, this process will start manually. Means developer need to start to build manually because that is a critical thing. If due to any error this process starts automatically we will publish a new build to Beta channel. That is why my suggestion. If you are new to Automation. Don’t automate this step.
development: This branch will be attached to our DebugBuild. It’s mean every time we are ready to send a build to QA we will send from development. This process will be 100% automated. Once we merge a ‘pull request ‘ Continuous Integration and Continuous Delivery will start and in the end build will be delivered to QA, Stakeholder etc…
( Those who don’t know what is a pull request. Do not take tension I will explain that in this section. )
feature: This is not one branch. Basically, every feature is a separate branch. Once developer completes his feature he will send a pull request to development. Once after code review request is merged with development. Jenkins will start automation automatically.
Below is a small graph which will more clear everything. What I discuss with you here.

Suggestion: Sometime’s what happened, one developer completed his feature but you want to wait for other features before sending a build. If you have this type of scenario. Then I will recommend you. Create one more branch in between feature and development. You can give any name like ReadyToMerge. Maybe for some of my reader’s it’s useless. But truly saying don’t make things complex if you are not experienced with this. That is not a bad thing if you have an extra branch. Now, a question is what will be the benefit of this branch? So from now, all team members will start sending there pull request on this branch. Do code reviews and merge in this branch. Once a team is ready to send a build to QA. Anyone generate a pull request from ReadyToMerge branch to the development and this time there is no need to do a code review because already you did a code review in ReadyToMerge branch. Only do a merge and Jenkins will start a Continuous Integration and Continuous Delivery process. Now, once you feel your team is good with this process and you are getting proper requirement from Business. You will feel automatically this ReadyToMerge branch is useless. At that day you can delete this branch.
To make easy this thing easy, I am going to share with you one simple graph. Which will clear your ambiguities if you have?

Pull request:
Pull requests are a feature that makes it easier for developers to collaborate. They provide a user-friendly web interface for discussing proposed changes before integrating them into the official project.
I am going to show you how you can generate and merge. That will give you clear image what is a pull request.
Below is our git structure on GitHub:

Now, I am going to do some changes in our LoginActivity. So I can show you, how you create a pull request? how you do a code review? how you do a merge?

After clicking this New Pull Request button. This will open a new screen as shown below:

On this screen, we need to select the branch which we want to select as a source as shown above.
 Then I need to select destination branch as shown above.

After selection complete, we will create a pull request. This is the whole process of Pull Request creation. After creation, your team members can see the changes in a code just like as shown below:

After code review, if everything is good, your team will do a merge request as shown below:
 After clicking of this button. A code will be merged successfully into the destination branch as shown below:

Note: Pull request feature is available on all VCS ( Bitbucket, Gitlab, … ) may be UI will be a difference but concept will be same.
Now, we are on the point where Jenkins needs to start its work.
Unit Tests:
As we already know this is not the Unit Test tutorial. So, I am not going to explain how to write a unit test and different frameworks. I will only share with you some dummy Unit tests which we are going to use as a test case in our Continuous integration.
So, we are using MVP architecture for LoginActivity. Due to this architecture, I got one benefit, my presenter always contains business logic or flow control of our app without Android OS API’s. It is mean I can run my test on JVM without an emulator or device. Which is really fast to execute.
/**
 * Created by waleed on 25/03/2018.
 */
@Suppress("IllegalIdentifier")
class LoginPresenterTest {

    private lateinit var presenter: LoginPresenter

    @Mock
    lateinit var view: LoginViewContract

    @Mock
    lateinit var repo: LoginDataSource

    @Before
    fun setUp() {
        MockitoAnnotations.initMocks(this)
        presenter = LoginPresenter(view, repo)
    }

    @Test
    fun `when username empty should show empty username error`() {

        presenter.onLoginClick("", "")
        verify(view, times(1)).showEmptyUsernameError()


        // Optional verifications
        verify(view, never()).showEmptyPasswordError()
        verify(view, never()).showSomethingWentWrong()
        verify(view, never()).startHomeActivity()

    }


    @Test
    fun `when username not empty but password empty should show password error`() {

        presenter.onLoginClick("HafizWaleedHussain", "")
        verify(view, times(1)).showEmptyPasswordError()


        // Optional verifications
        verify(view, never()).showEmptyUsernameError()
        verify(view, never()).showSomethingWentWrong()
        verify(view, never()).startHomeActivity()

    }

    @Test
    fun `when API return false should show something went wrong error`() {

        _when(repo.doLogin()).thenReturn(false)
        presenter.onLoginClick("HafizWaleedHussain", "123456")
        verify(view, times(1)).showSomethingWentWrong()


        // Optional verifications
        verify(view, never()).showEmptyUsernameError()
        verify(view, never()).showEmptyPasswordError()
        verify(view, never()).startHomeActivity()

    }

    @Test
    fun `when all scenarios are successful should verify startHomeActivity`() {
        _when(repo.doLogin()).thenReturn(true)
        presenter.onLoginClick("HafizWaleedHussain", "123456")
        verify(view, times(1)).startHomeActivity()


        // Optional verifications
        verify(view, never()).showEmptyUsernameError()
        verify(view, never()).showEmptyPasswordError()
        verify(view, never()).showSomethingWentWrong()

    }
}
Above is our code of Unit Tests which is written in Kotlin. Those who are new in Kotlin for them I am going to explain one thing. Name of our unit tests. As you can read they are just like sentences with spaces. So, to make your unit tests names more readable you can use @Suppress(“IllegalIdentifier”) on a class name. After that, you can start your unit tests name like fun `name of your test`() and the compiler will not complain you about anything. It’s time to run unit tests on a local machine. Below is our unit test result.

Functional Tests:
Just like unit tests, I will share with you our code of Functional tests.
@RunWith(AndroidJUnit4::class)
class LoginActivityTest {

    @get:Rule
    val mActivityTestRule = ActivityTestRule(LoginActivity::class.java)

    @Test
    fun whenLoginClickWithEmptyUsernameShouldShowUsernameEmptyToast(){
        Espresso.onView(ViewMatchers.withId(R.id.button)).perform(click())
        toastIsDisplayed(R.string.enter_username)
    }

    @Test
    fun whenLoginClickWithEmptyPasswordShouldShowPasswordEmptyToast(){
        Espresso.onView(ViewMatchers.withId(R.id.LoginActivity_username_edit_text))
                .perform(ViewActions.typeText("Hafiz"))
        Espresso.onView(ViewMatchers.withId(R.id.button)).perform(click())
        toastIsDisplayed(R.string.enter_password)
    }

    @Test
    fun whenLoginClickWithValidCredentialsShouldOpenHomeScreen() {
        fun input(text:String,@IdRes id: Int){
            Espresso.onView(ViewMatchers.withId(id))
                    .perform(ViewActions.typeText(text))
        }
        input("Hafiz", R.id.LoginActivity_username_edit_text)
        input("123456", R.id.LoginActivity_password_edit_text)
        Espresso.onView(ViewMatchers.withId(R.id.button)).perform(click())

        Espresso.onView(ViewMatchers.withId(R.id.MainActivity_recycler_view))
                .check(ViewAssertions.matches(ViewMatchers.isDisplayed()))
    }

    private fun toastIsDisplayed(@StringRes stringId: Int){
        Thread.sleep(1000)
        onView(withText(stringId)).inRoot(withDecorView(not(`is`(mActivityTestRule.activity.window.decorView)))).check(matches(isDisplayed()))
    }

}
Above is our functional test for login. Maybe you can ask this question. Why are we not using same readable name technique in Functional Tests? So, I try to use here but I don’t know due to some issue that is not working properly.
Now, once we execute our Functional Tests that looks like as shown below:

Gradle build system and commands:
As we know, on Jenkins we need to work with the terminal based system. It’s mean we need to write scripts or in case of Android we Gradle. In this section, I will share with you those commands which we need here plus I will explain to you if some extra tips which may be helpful if you have a project with different variants and flavors.
clean:
This command will delete our build directory. That will be good if you call this command every time before doing any operation.
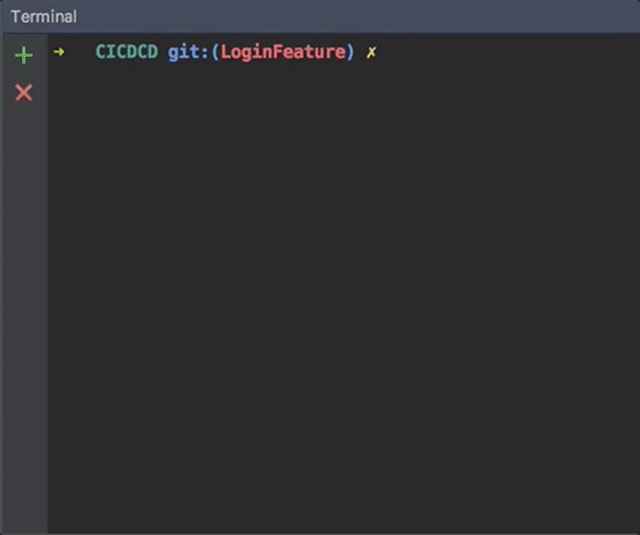
I am using Android Studio terminal for executing these commands.
test:
To run a unit test from a terminal. We can use test command. But that will run all unit tests which we have in our project. In our case that will be ok. Now, imagine you have a project with 4 variants and 2 flavors. Its mean at one time you only want to run one specific flavor + variant unit tests. To achieve this, we have a command which I am going to share with you.
For example, I have Free and Pro flavors and I have Debug, Staging, Pre-prod and Release environment. I want to run Unit tests only for free flavor with Debug environment. So for that, I will execute command.
./gradlew testFreeDebugUnitTest. This command only run my FreeDubg Unit Tests. To make easy we can remember its format as shown below:
test [flavor name] [variant name] UnitTest.
Now back to our project. As we know we already have two variants but zero flavor. So for that, I will use a testDebugUnitTest command.
connectedAndroidTest:
To run functional/UI or espresso tests. You can use this command but again this will run all tests from all flavors and variant. So we can use the same syntax for this command which we used in case of Unit Test. As we have two variants and zero flavors. So my command is connectedDebugAndroidTest.

assembleDebug:
To create a debuggable APK. We will use this command. Again if you have flavors and variants then you need to use the same format. Like assembleFreeDebug but in our case, we will go with assembleDebug because we don’t have any flavors.
Again, this command will generate an APK in build/output folder. Maybe today we will not use in our Jenkins but we will use this command when we are working on artifacts.
There are many other commands but these we will explore in next parts. Now its time start working on Jenkins.
Jenkins integration:
We already installed Jenkins in our first part. So open your Jenkin Dashboard on the browser and create a new job just as shown below:

Next, create a build as shown below:

Here, I selected Freestyle Project. You can select Pipeline, but there you need to write everything as a script. So for this series, I am going with freestyle. I have a feeling that will be helpful for everyone who new or experienced in the industry.

After creation of the build. It looks like as shown above.
There we have a lot of options. But I will discuss with you only those which we will use here.
Source Code Management:
First, select Git as shown below:

Next click Add button which is in front of Credentials and add your credentials in Jenkins Credentials Provider.

After adding successful you will be back to Git selection screen. Now add there your GitHub URL of project and select you credentials which you added in Jenkins in the last project. If everything is ok you will see something like as shown below.

As you can see in above image. I selected development branch for Continuous Integration, Continuous Delivery.
Build Triggers:
Next is build triggers.

In simple words. When anyone does a merge request in development. We want our Jenkins should start automatically. For that process we use triggers. We will discuss this in a Webhook topic in next post.
Build Environment:
Currently, I am not going to use this section for our series.

Build:
This is the key section of our build. Here we will write our scripts for creating a build, unit tests report or anything which is related to build step.
First, we will start simple example. I am going to write one script which only shows a Hello World on our Jenkins output and complete the build.


As shown above images. Click Add build step and the select Execute shell for this example only. Once you complete this selection you will see something like as shown below:

Now, its time to write a hello world script.

Wow, I am feeling happy we are very near to our goal. After writing a script we need to save our configuration. So click save.

Once you click save. You will be on a Dashboard just as shown below:

Now click “Build Now” as you can see in above image. That will start our JOB as shown below:

Now, click on above Build History. That will open the details of the build as shown below:

Now, click on the Console Output where we can see the logs of our build. Also in our current case that need to print “Hello World” on the console output. Its time to show you Console output.
 HURRAY. Our build is successful and Build output showing “Hello World”.
Now its time to go back to our original topic. Need to add Gradle commands which we already discussed. For that you need to click “Configure” again as shown below:

After that, go into Build section and add Invoke Gradle Script just like we added Execute Shell and add our Gradle commands which we already learn. One more thing command should be in a proper sequence.

After save. Go outside to Build Dashboard and then click Build. A process will start again but this time that will be long. You can open the console output just like we did last time and see what is going on in Jenkins.


So, as can see Jenkins downloading all the libraries which are required for our project. That is same when you run first time your project on Android Studio.
After some time, when all required dependencies are downloaded my build is failed by showing below message:
 If you installed Jenkins on your local machine, then maybe you will not face this issue. Or if you face you can add an ANDROID_HOME in Jenkins I will show you below. But for those who are using Docker for Jenkins, I will explain to you how we can fix this issue in that case later. So first for those who are running Jenkins on a local machine.
Go to the main Dashboard and click Manage Jenkins:

After that click Configure System as shown below:

Scroll down and try to find out Environment Variable as shown below:


After that click Save and run again. Your build will be successful. Now if you are using Docker. Then you need to do below steps:
docker pull xmartlabs/jenkins-android
docker run -p 8080:8080 -p 50000:50000 xmartlabs/jenkins-android
Basically above commands will download new Jenkins which also contain AndroidSDK and Java. That will take some time but that only steps which we need to do in case of Docker.
After completion of download I setup Jenkins and I run the build. And I got successful as shown below:

Here, I removed connectedAndroidTest from our Gradle invoke. So currently Jenkins only do clean, unit tests run and will generate an APK but after successful, we are not able to get APK in this part. That we will do in next part.
Revision:
- We discuss a little bit about Kotlin Language and LoginActivity.kt.
- Git structure of our code ( master, development, feature or master, development, readyToMerge, feature).
- What is a Pull request?
- Unit and Functional tests writing especially in Kotlin.
- Gradle build commands clean, test, connect, assemble.
- Jenkins Integration ( Build, Configuration, Execute Shell, Gradle Invoke Script, Failed Build Case, Passed Build Case ).
Part 3
Conclusion:
A post is already very long. So today I am not writing anything in conclusion. We will meet in next part 3. Hope you enjoy this post. BYE
The Gradle wrapper has not been found in these directories. I am getting this error
The Gradle wrapper has not been found in these directories. I am receiving this error